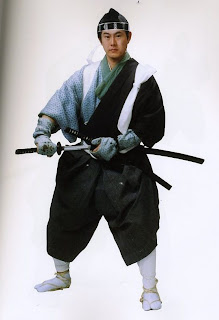
 my first step was getting a picture i own a book that is full of people dressed as samurai and other feudal Japanese clothes its a great reference book and i thought i could use it for a base for this finally instead of sketches
so i scaned the picture in and opened it in illustrator
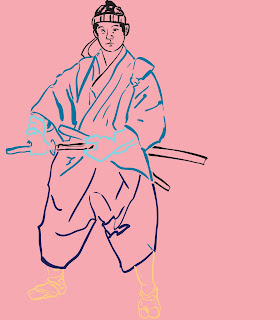jpg.jpg) once in illustrator locked the layer and opened a new layer for the line art. i used the blob brush to do the line work after useing the blob brush multipull times it has probably became one of my favorite tools i turned the variation up alittle. after i drew it out i broke some of the lines and started to make them different colors
once in illustrator locked the layer and opened a new layer for the line art. i used the blob brush to do the line work after useing the blob brush multipull times it has probably became one of my favorite tools i turned the variation up alittle. after i drew it out i broke some of the lines and started to make them different colorshttp://ucmconnect.ucmo.edu/p71524269/(class tutorial on the blob brush)
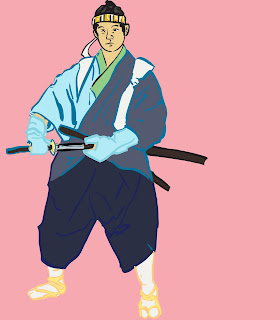jpg.jpg) once i was done with the line work i moved it over to photoshop i started by locking the line aart layer then i added in a pink background on a seperate layer and lock that layer too. from there i opened a 3rd layer and named it color here i layered in flat color for the base of the illustration
once i was done with the line work i moved it over to photoshop i started by locking the line aart layer then i added in a pink background on a seperate layer and lock that layer too. from there i opened a 3rd layer and named it color here i layered in flat color for the base of the illustration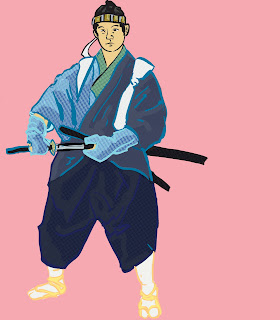.jpg) after this i opened up a new layer and filled the layer with a color i think it was orange from there i went to filter and clicked on pixelate then color halftone i chose 8 from there i went to channels and got rid of the blue and red channels and chose the green channel and the dots it left from here i made a pattern out of it then i filled a new layer with the pattern and turned the channels back on. i did this again but this time i kept the blue dots they were bigger
after this i opened up a new layer and filled the layer with a color i think it was orange from there i went to filter and clicked on pixelate then color halftone i chose 8 from there i went to channels and got rid of the blue and red channels and chose the green channel and the dots it left from here i made a pattern out of it then i filled a new layer with the pattern and turned the channels back on. i did this again but this time i kept the blue dots they were biggerafter this i made another layer i used the halftone pattern filter it is under the sketch filters i used horizontal lines
once all 3 of these layer were made i started to change which ones u saw where and played around with them creating textures
sadly i forgot to save pics of these steps after this i merged the 3 layers together and started to erase to create highlights this was a new idea i thought of and decided to try
http://ucmconnect.ucmo.edu/p31089225/ (class tutorial of the pattern technique)
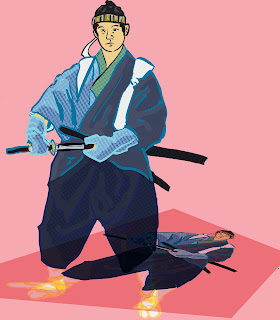.jpg) once i was done with the pattern i decided i want to finish it up with making a shadow the way i went about this was by coping the layer then putting it in multiply and then using the skew function under transform i skewed the new one that was on top after skewing it to the way i wanted i locked it
once i was done with the pattern i decided i want to finish it up with making a shadow the way i went about this was by coping the layer then putting it in multiply and then using the skew function under transform i skewed the new one that was on top after skewing it to the way i wanted i locked it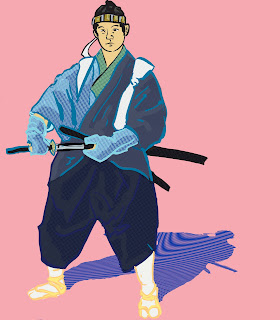
then last thing i did was create a Moire pattern this is kinda hard to explain easier to watch heres the tutorial babcock did for it http://ucmconnect.ucmo.edu/p31089225/ (its the same as the one for dot patterns) once i made the two layers i moved them around and skewed them till i was happy with the effect from there i opened the skewed layer i made before and started to erase the shadow image out this took awhile because i didnt want to screw up
there is probably a better faster way but that ok im happy with the result
overall im very happy with this piece and feel i learned alot from doing the master study and two interpriations from this point i want to expariment more im really starting to like the pattens and how they can add texture

This is a great idea to combine the halftone dots with the line work. I think I still prefer mostly black lines to the colored ones though.
ReplyDelete